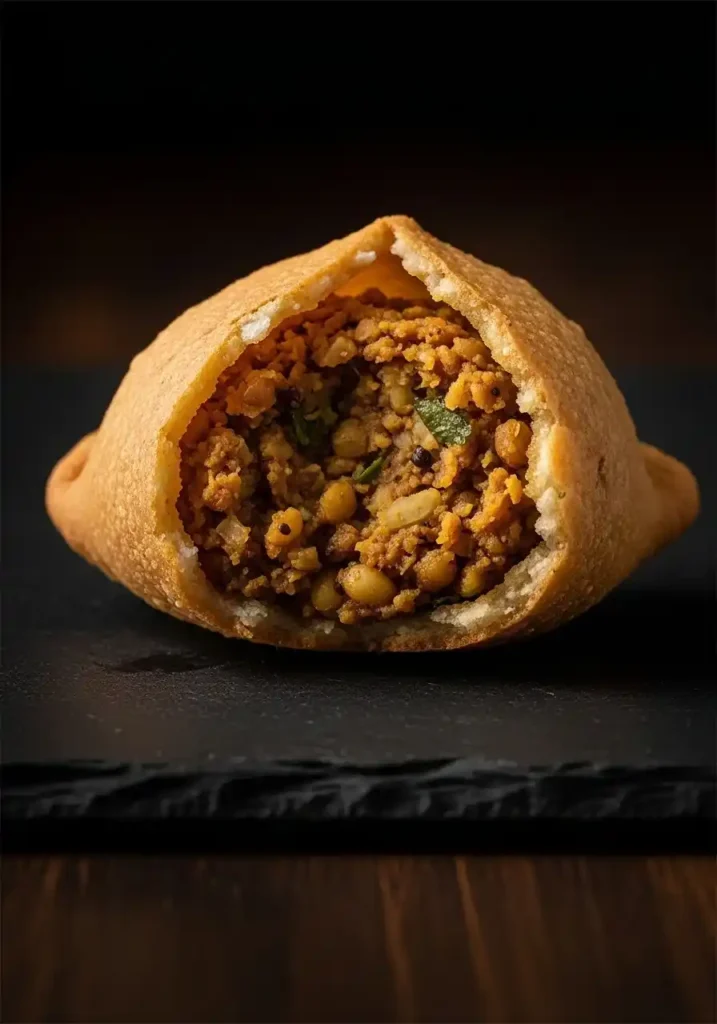
Kachori – Crispy, Flaky Pakistani Street Food Snack
Few snacks in South Asian cuisine carry as much love, nostalgia, and cultural weight as kachori. These golden, crispy, flaky pastry spheres — fried to perfection and filled with a boldly spiced stuffing — are a staple of Pakistani and Indian street food culture, a beloved Ramadan iftar treat, and a morning tea-time favorite that has been enjoyed for generations across the subcontinent.
Whether you enjoy them filled with spiced dal (lentils), aloo (potato), or a mixed masala, kachori always delivers that irresistible crunch on the outside and a deeply flavored, fragrant filling on the inside. This recipe gives you everything you need to make them perfectly at home — from the flakiest pastry to the most authentic filling.
The Story and Significance of Kachori
The kachori has deep roots in Mughal-era cooking and is widely believed to have originated in the kitchens of Rajasthan and North India before becoming an integral part of Pakistani culinary culture. In cities like Lahore, Karachi, and Peshawar, kachori stalls line the streets from early morning — serving these golden puffs with tangy tamarind chutney, fresh yogurt, and a sprinkle of chaat masala.
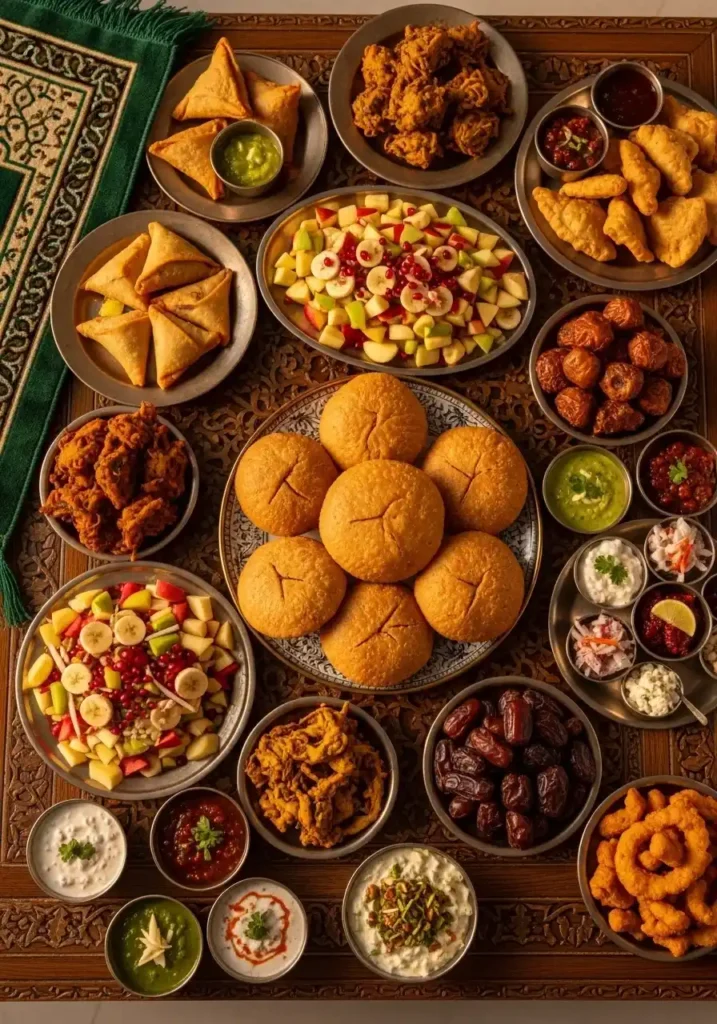
During Ramadan, kachori is one of the most anticipated iftar snacks, eaten immediately after the fast breaks with a cup of tea or alongside pakoras and samosas. Its combination of flaky pastry and warmly spiced filling makes it one of the most comforting, beloved street foods in all of Pakistan.
Ingredients You Will Need
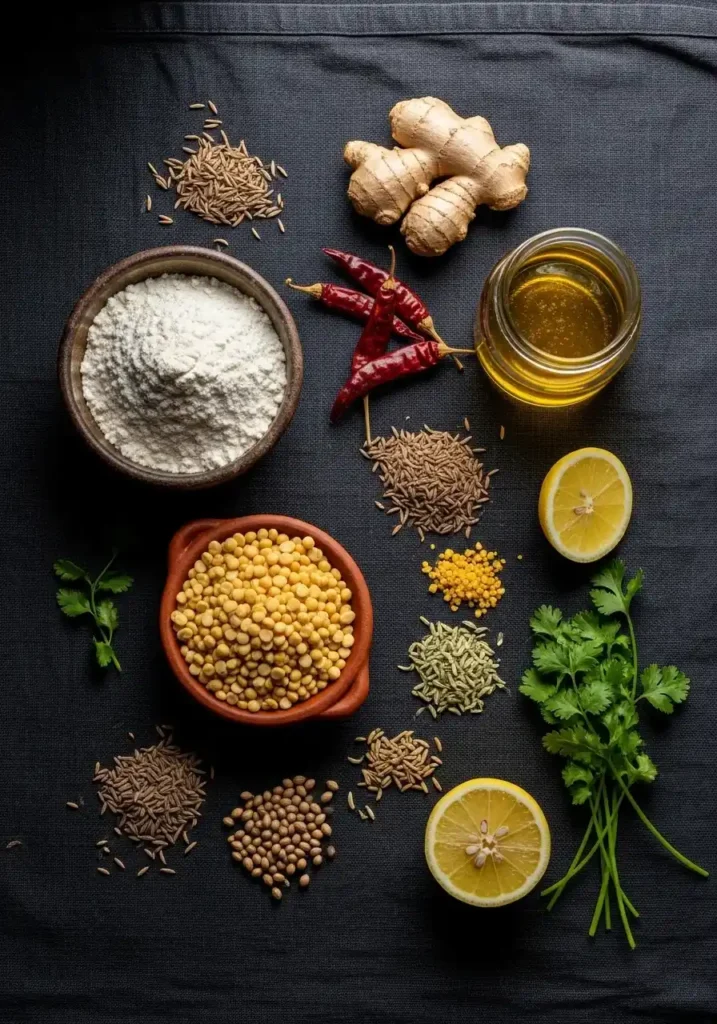
Here is a complete breakdown of everything needed for authentic kachori — both the flaky pastry shell and the classic spiced filling.
For the Pastry Shell:
| Ingredient | Amount | Notes |
| All-purpose flour | 2 cups (250 g) | Plus extra for dusting |
| Oil or ghee (for dough) | 3 tbsp | Ghee gives better flakiness |
| Salt | ½ tsp | Balances the dough |
| Water (cold) | 6-7 tbsp | Add gradually as needed |
| Oil | For deep frying | Vegetable or canola oil |
For the Spiced Dal (Lentil) Filling:
| Ingredient | Amount | Notes |
| Chana dal (split chickpea) | ½ cup (100 g) | Soaked 2 hrs; coarsely ground |
| Oil | 2 tbsp | For the filling masala |
| Cumin seeds | ½ tsp | Fried for flavor base |
| Fennel seeds (saunf) | ½ tsp | Classic kachori spice |
| Ginger (grated) | 1 tsp | Fresh ginger only |
| Green chili (chopped) | 1-2 | Adjust to heat preference |
| Coriander powder | 1 tsp | Earthy base note |
| Red chili powder | ½ tsp | For heat and color |
| Amchur (dry mango powder) | ½ tsp | Key souring agent |
| Garam masala | ¼ tsp | Finishing spice |
| Salt | To taste | Season generously |
| Fresh coriander (chopped) | 2 tbsp | Stirred in at the end |
Equipment You Will Need
You will need a large mixing bowl for the dough, a food processor or hand grinder for the lentils, a deep heavy-bottomed pot or kadai for frying, a kitchen thermometer for oil temperature, a rolling pin, a small round cutter or lid (about 3-4 inches diameter), and a slotted spoon or spider strainer for lifting the kachori safely from the hot oil.
Step-by-Step Instructions
Step 1 – Soak and Prepare the Dal
Wash the chana dal thoroughly and soak it in cold water for at least 2 hours. Soaking softens the lentils, making them much easier to grind and cook quickly. After soaking, drain well and pulse in a food processor until coarsely ground — you want a rough, textured mixture, not a paste. There should still be visible small pieces of lentil for the best filling texture.
Step 2 – Make the Spiced Filling
Heat oil in a pan over medium heat. Add the cumin seeds and fennel seeds and let them sizzle for 30 seconds until fragrant. Add the grated ginger and chopped green chili and cook for 1 minute. Add the coarsely ground dal and stir well to coat with the spiced oil. Cook for 5-7 minutes, stirring frequently, until the dal is cooked through and dry — it should not be wet or sticky.
Add the coriander powder, red chili powder, amchur, garam masala, and salt. Stir everything together and cook for another 2-3 minutes until the spices are fully incorporated and the filling is dry, crumbly, and deeply aromatic. Remove from heat and stir in the fresh coriander. Allow the filling to cool completely before stuffing — warm filling makes the kachori pastry soggy and difficult to seal.
Step 3 – Make the Pastry Dough
In a large bowl, combine the flour and salt. Add the ghee or oil and rub it into the flour using your fingertips until the mixture resembles fine breadcrumbs — this step creates the flaky layers in the final kachori. Add cold water one tablespoon at a time, mixing gently after each addition, until a firm, smooth, non-sticky dough forms. Do not over-knead — this is not a bread dough. Cover and rest for 20-30 minutes.
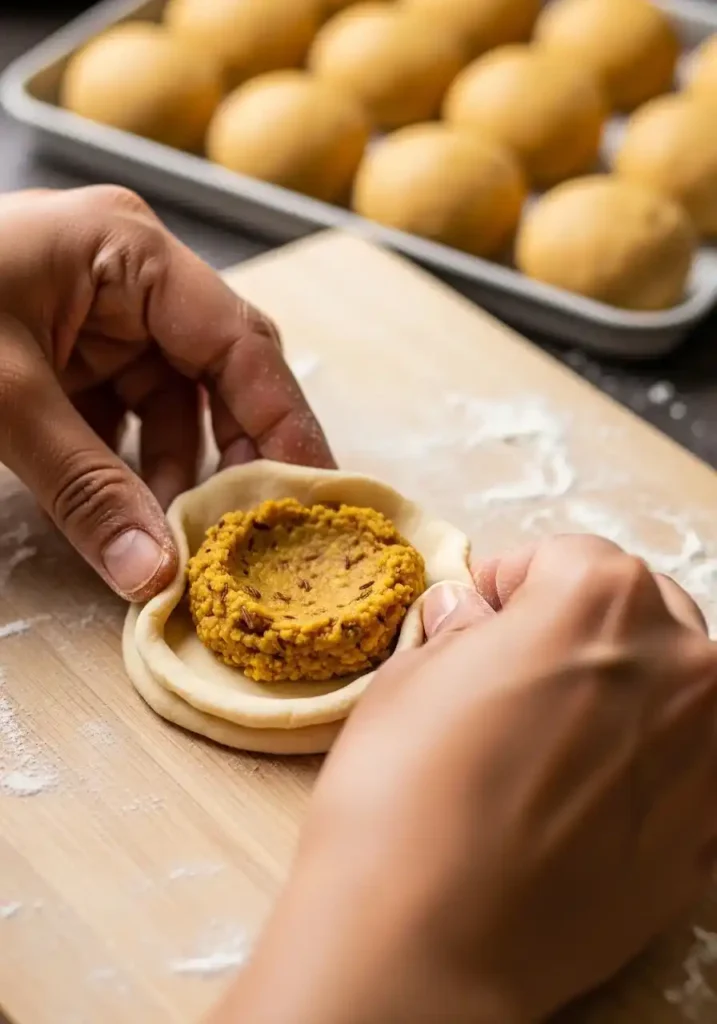
Step 4 – Stuff and Shape the Kachori
Divide the rested dough into 12-14 equal balls. Take one ball and flatten it into a small disc about 3 inches in diameter using your palm or a rolling pin. Place a generous teaspoon of the cooled filling in the center. Bring the edges of the dough up around the filling and pinch tightly to seal — make sure there are no gaps or cracks. Roll the sealed ball gently between your palms to smooth it into an even sphere. Repeat for all remaining kachori.
Do not flatten the shaped kachori with a rolling pin — they should stay round. Pressing them flat is a common mistake that results in thin shells that can burst during frying. Keep them plump and round for the best result.
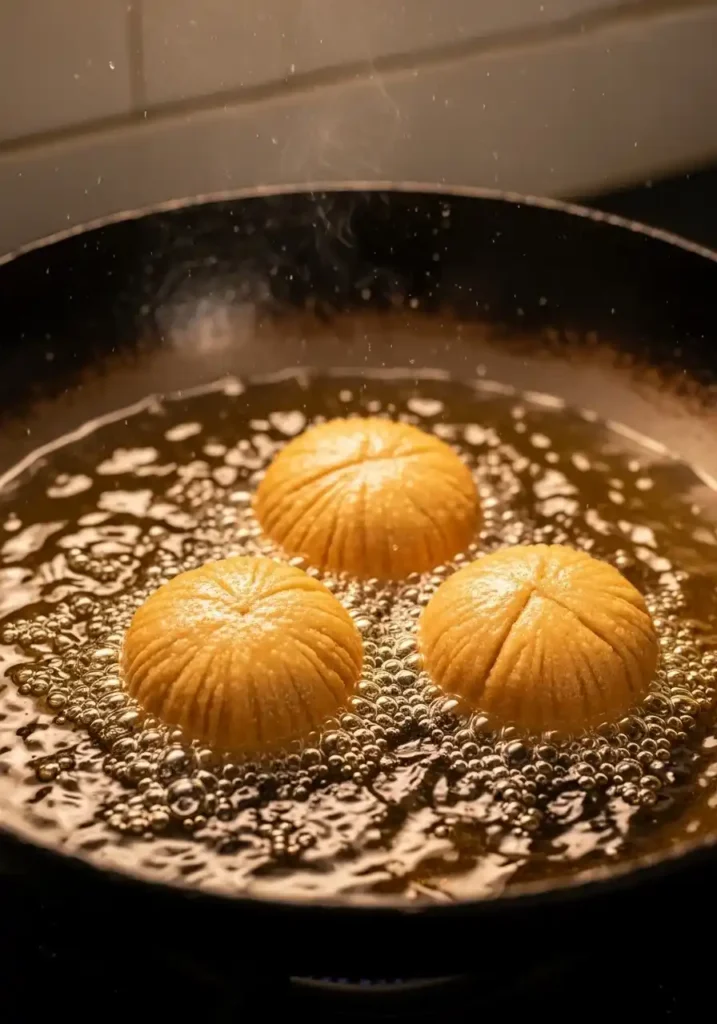
Step 5 – Fry to Golden Perfection
Heat oil in a deep pot to 300-320 F (150-160 C). This lower-than-usual frying temperature is the most important secret to perfect kachori. Frying at low-medium heat gives the pastry time to cook through slowly, puff up, and become deeply crispy and flaky throughout — rather than just brown on the outside while remaining raw inside. Gently lower 3-4 kachori into the oil and fry for 10-14 minutes, turning every 2-3 minutes.
The kachori are done when they are a deep, uniform golden-brown all over and feel light when lifted with a slotted spoon — this means the inside is fully cooked and the shell has become hollow and crispy. Drain on a paper towel-lined tray and serve hot.
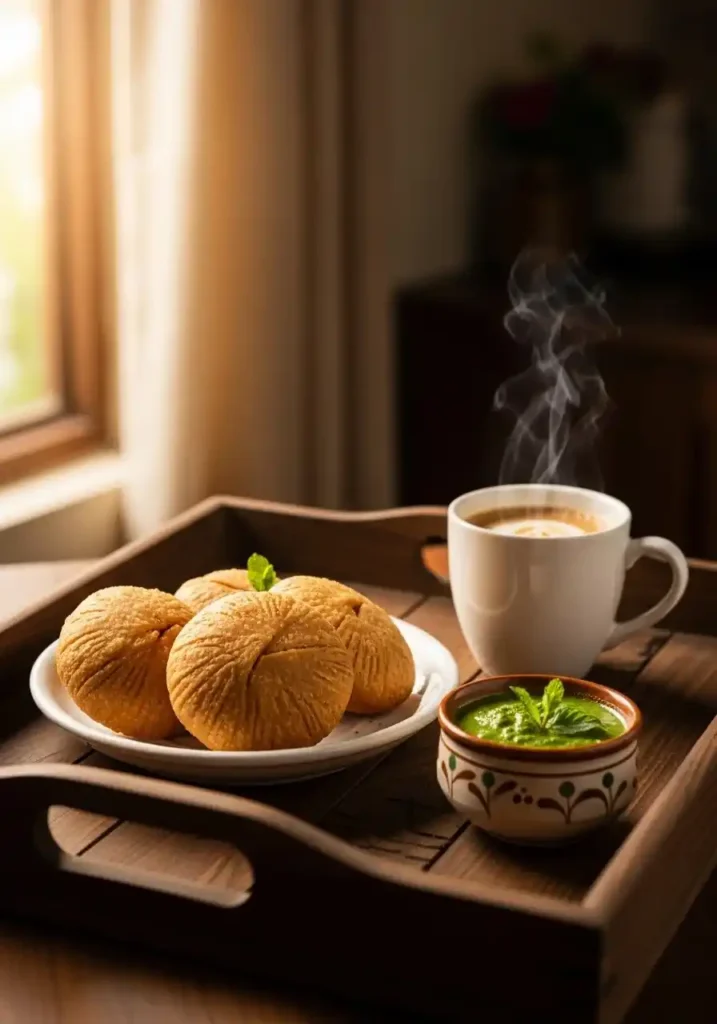
Step 6 – Serve the Traditional Way
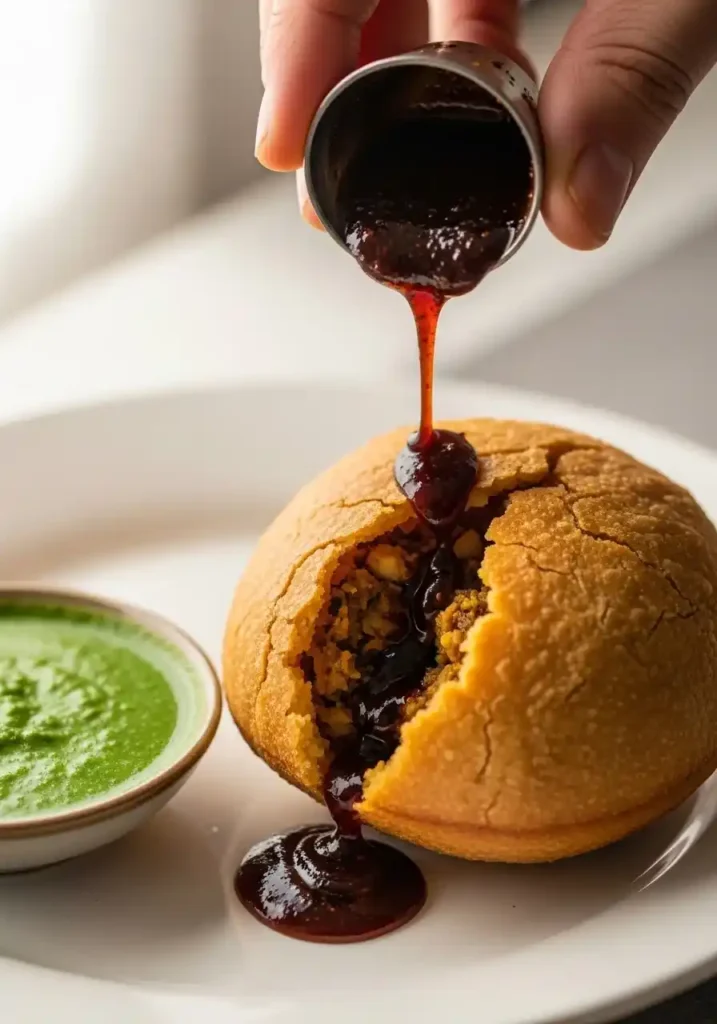
Authentic kachori is served with a trio of accompaniments: sweet-tangy tamarind chutney, bright green mint chutney, and a generous pour of plain or spiced yogurt. Crack a small hole in the top of each kachori and spoon a little of each chutney inside for the full street food experience. Dust with chaat masala and a pinch of red chili for an extra layer of flavor.
Pro Tips for Perfect Kachori
Rub fat into the flour properly. The flaky layers in kachori come entirely from how thoroughly you rub the ghee or oil into the flour before adding water. Take 3-4 full minutes for this step — the mixture should feel like damp sand before any water is added.
Keep the filling completely dry. Any moisture in the filling will steam inside the kachori during frying and cause the pastry to burst open. Cook the filling until it is dry and crumbly, and allow it to cool fully before stuffing.
Fry low and slow. This is the most critical rule. High oil temperature browns the outside before the inside cooks, resulting in raw dough in the center and a shell that is not fully crispy. Low-medium heat is non-negotiable for perfect kachori.
Seal tightly. Any gap or crack in the seal will allow oil to enter the kachori during frying, making it greasy and causing it to burst. Take extra care pinching the edges completely shut and smooth out any visible seams before frying.
Popular Kachori Variations
While the classic dal kachori is the most traditional, there are wonderful variations worth exploring. Aloo (potato) kachori uses a spiced mashed potato filling similar to samosa filling and is particularly popular at iftars and tea time. Onion kachori uses a caramelized onion and spice filling for a milder, sweeter flavor. In Karachi, you will find kachori topped with chickpea curry, yogurt, chutneys, and sev (fried chickpea noodles) for a complete street food meal.
How to Store and Reheat
Kachori is best eaten fresh and hot, but it can be stored at room temperature for up to 1 day and reheated in the oven at 325 F (160 C) for 8-10 minutes to restore the crispiness. Do not store in an airtight container as trapped moisture will soften the shell. A loosely covered plate or an open container keeps them crispier for longer. Avoid reheating in the microwave — it makes the pastry soft and chewy.
Final Thoughts
Making kachori at home is one of the most rewarding baking and frying projects you can undertake. The combination of deeply flaky, golden pastry and a boldly spiced, aromatic filling is something that no store-bought version can ever replicate. Once you master the technique — especially the low-and-slow frying method — you will be making these for every iftar, every tea gathering, and every celebration for years to come.
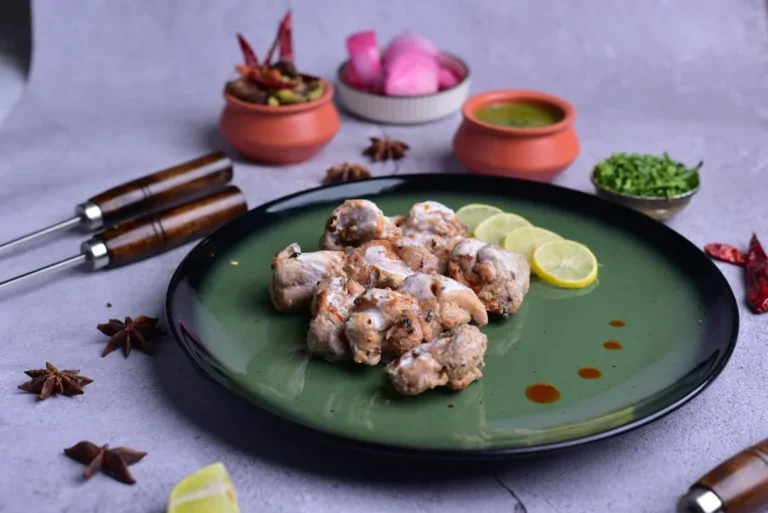
If you love bold, spiced Pakistani snack recipes, you will also love our Chicken Tikka Sliders — juicy, charred tikka chicken in soft toasted buns with creamy mint chutney sauce that makes for the ultimate fusion party snack!